This page contains a complete list as well as explanations for many of the features of Mods for RWBY: Grimm Eclipse.
General Introduction[]
gvk's mod has grown exponentially since inception. From being a simple one feature only mod, used to make the game a little more fun, to being a mod with menus and commands for controlling all the features. Every now and then gvk updates his mod to add features or to fix bugs. When a new game patch is released gvk is quick to update broken mods.
Mods can be used in multiplayer. However, mods that change the gameplay in any way cannot be used in public games. For example, graphics can be changed in public games (those only affects the user) while spawning Grimm or godmode cannot be used, as that would change the gameplay. Any resources changes such as textures, sounds and models, will only appear on the user screen (client only) meaning other players cant see the changed textures.
If the user wants to play with all mods in multiplayer, create a friends only game (or use the start game button in mod menu, it will also create a friends only game). Note: The friends also need the mod to join.
Mods cannot help with cheating the game. For example spawning Grimm does not count for rank requirements, so mods cannot be used to advance in rank faster than the normal user could nor get achievements easier.
These two points are made for various reasons on behalf of the developers of RWBY: Grimm Eclipse and gvk. Developers asked for this[1] and these points were of course accepted and implemented by gvk. This is to keep things fair for everybody - nobody should get advantages just because they have mods. Also, to not annoy players who just want to enjoy the native game.
Everybody can enjoy the mods, it is both for Windows users and Mac users. Installing the mods is not difficult either, as gvk has made it easy for anybody to download and install mods with the press of a button. See this page for installation instructions.
Main Menu[]
At the Main Menu there is now a new button at the bottom of the menu, with the text "Mods". If clicked on, it will open the Mod Menu.
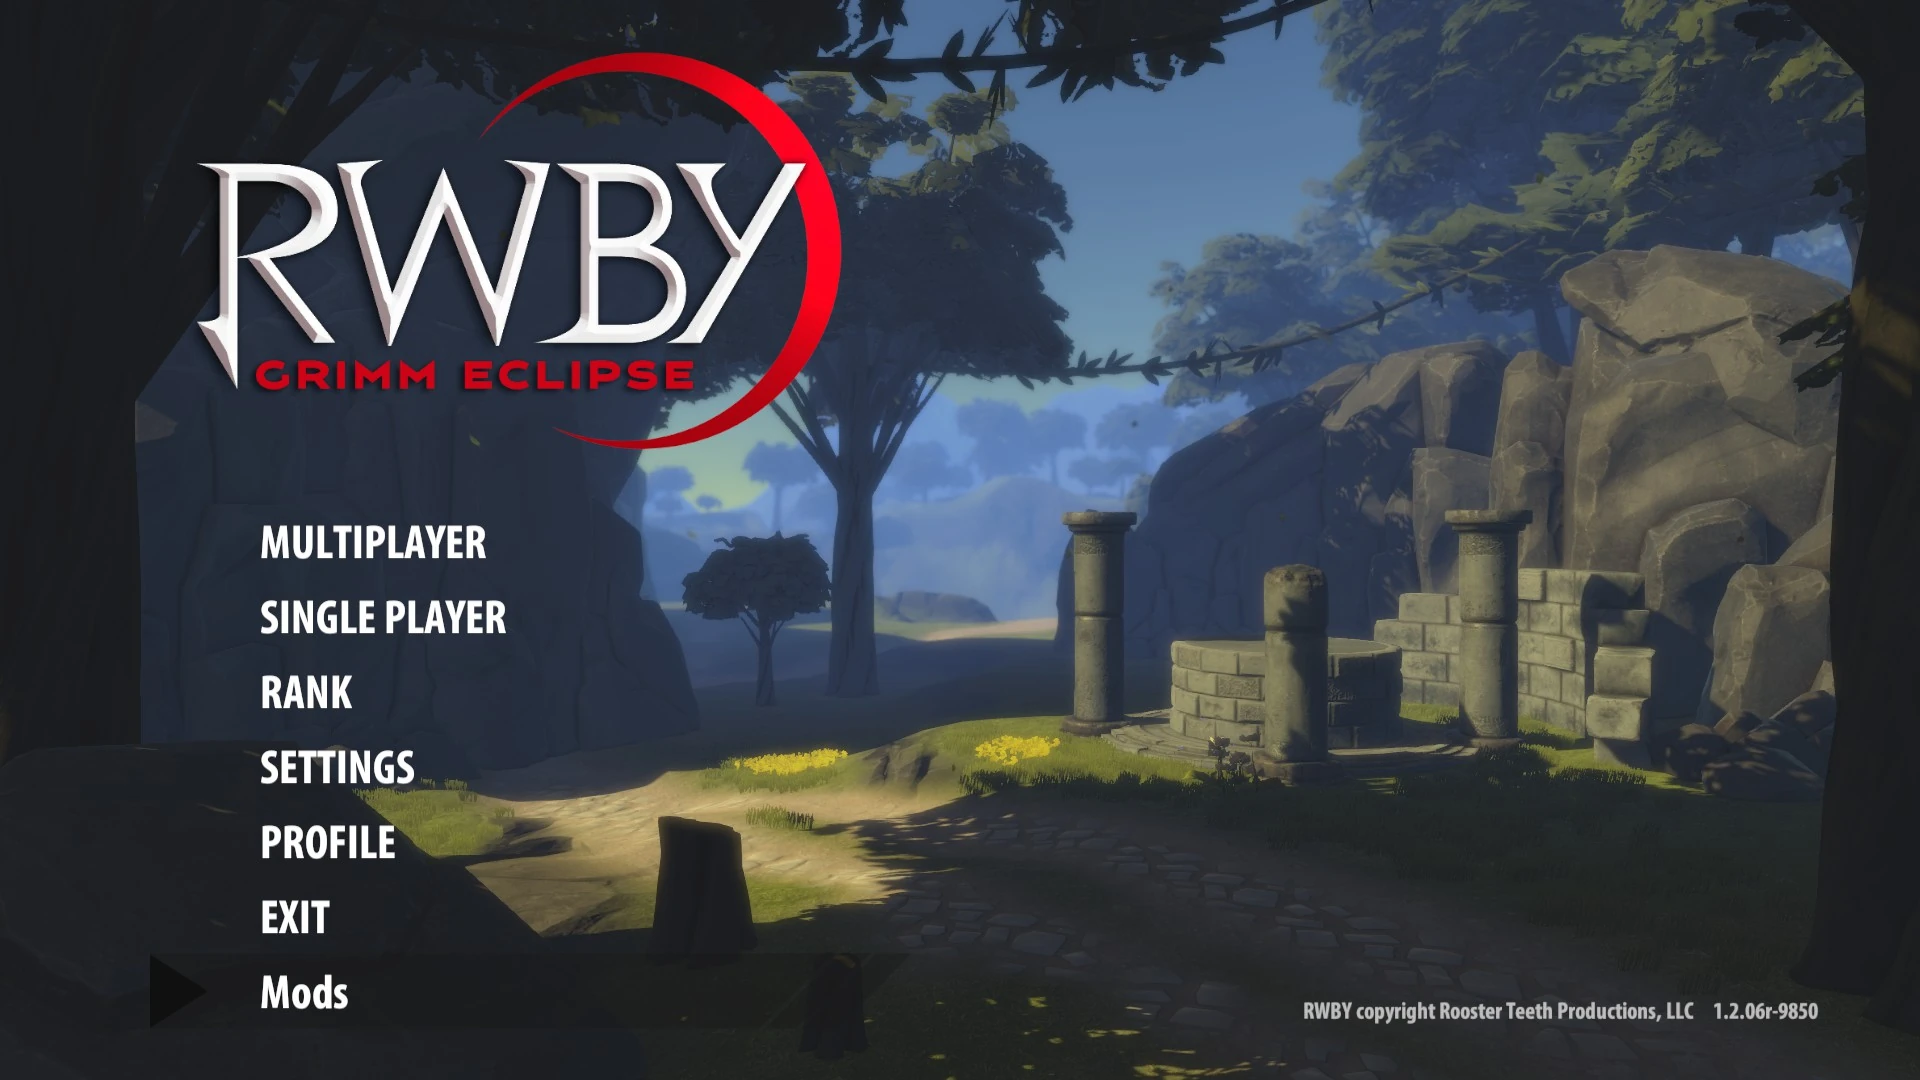
Main Menu with mods.
There is also button saying "PROFILE". When clicked it will open the profile menu. This menu shows all your stats for the game, more than one would imagine. There will also be an option to style the characters.
If Control (ctrl) button is held, a list will pop up where it will list actions and their respective key:
- C-key: Plays credits for RWBY: Grimm Eclipse.
- 1-key: Clear Player/User Input.
- 2-key: Fix Dead Zones.
- 3-key: Clear Key Binding Move.
- 4-key: Reset Key Binding Move.
- 5-key: Enable AntiCheat (beta - please report problems to gvk)
- 6-key: Unload Unused memory.
- 7-key: Check Materials, to prevent crashing for users with problems.
- 8-key: Only use Standard shaders.
- F-Key: Open Local Files Folder.
- R-key: Resets screen settings, in case it is messed up.
- L-key: copies output_log to the clipboard.
- P-key: copies the 'recently played with' to the clipboard.
- M-key: Change Server to connect to.
If, for example, ctrl+3 and then ctrl+4 are pressed it will do what it says. In this case, clear and reset. This may be useful for controllers that have stick drift, or similar problems.
Mod Menu[]
Default (Mod Settings)[]


This is what opens when clicking on the Mods button found in the Main Menu.
Here there are various buttons, some open other menus while others just change a setting in the mod.
When hovering over something, the little description text at the bottom right will explain what it is about.
The following is a list of buttons accompanied by a short explanation, for a more explanatory description please refer further down.
Non Settings buttons:
- Version, a label displaying current version installed, and if there is a new one for download. (lower left)
- Back, Returns to Main Menu.
- Start Game, Start a Friends Only game/match.
- Mod Settings, when clicked it displays Mod Settings tab/page.
- Game Modes, when clicked it displays Game Modes tab/page.
- Achievements, when clicked it displays Achievements tab/page.
- --> , when clicked it displays the next page.
- <-- , when clicked it displays the previous page.
- Select Map, brings up the map selection menu, where the user selects the map to start on.
- Key Bindings, brings up the key bindings menu, where the user may change key bindings.
- Resource Packs, brings up the resource packs menu, where the user may select texture, sound and model packs.
- Chat Commands, brings up a wall of text containing information about the chat commands. For more about chat commands as a feature, please refer below.
Settings buttons:
- Grimm Spawn, changes the number of grimm to spawn, goes through multiplier 1,2,3,4 and 5.
- Spawn Grimms, if enabled the user can spawn grimm either by the f-keys or by chat command.
- PVP, if enabled Players in the game may hurt each other.
- Low Gravity, if enabled the local player won't be affected by gravity as much as usual.
- Slow Motion, if enabled and M-key works as a toggle for slow motion mode.
- Max Level, increases the max level.
- Show HP Numbers, Shows actual number on HP bars and on the Ultimate bar.
- Bad Graphics, enables bad graphics, this is a preset. See Advanced settings.
- More..., shows some more options below:
- Acid Grimms, if enabled each grimm spawn is accompanied with a mutated creep.
- No Kick When Inactive, no longer kicked for being inactive.
- Change Grimm Stats, shows a menu with options to change the Grimm's default stats.
- Plugins, read about it below.
- Missions, read about it below.
- Credit for mods, shows credit for the mod (made by gvk).
Change Grimm Stats[]
The button brings up a menu to change different stats for the Grimm. Properties like: size, speed, health, regen, resistance, damage boost, knock back, knock up, stunning, can all be changed in this menu. To undo/remove settings click the Reset button or choose 'Activated: false'. Note: Activated has to say 'true' else this mod will not be active.
Plugins[]
Plugins are plugins both for the game and for the mod. These are community made, and allow for changes or additions, for example oculus rift support, or making grimm explode into confetti when they die. When the plugins button is clicked, a menu for plugins will open. Here installed plugins can be enabled or disabled.
Some plugins are already installed onto the game, like Steam, but those who are installed on the default game will not appear on the list.
Game Modes[]
Game Modes[]
- Survival, enables the Survival mode. Fight through endless waves of Grimm.
- Time Attack, complete a level as fast as possible
- Map God, Host plays as "God" and the mission is to kill the other players.
- Dust League (not available on Mac), Football/soccer game. Place football: P-key; place goal: O-key.
- Artifact Hunt, Easter Egg hunting but with artifacts. Artifacts are scattered around the map and the player is free to roam the land. (On Easter this mod becomes an easter egg hunting mod)
- Missions, read about it below
Missions (and Custom)[]
There are 4 default missions to choose from. When the Missions button is clicked, a list of all the available Missions will open, both Default (made by gvk) and Custom (made by community members). Users can install more missions. The list of missions can be scrolled down.
When a mission is chosen and clicked on, the mission will start. The game will open the appropriate map and give instructions about the mission. The missions have varying degrees of difficulty, and some missions also require a special map to be installed. In such a case, the mission is unplayable without the required map being installed.
Resource Packs[]
When the Resource Packs button is clicked a menu with 3 columns will open. One for each of the topics: Texture Packs, Sound Packs, Model Packs. This menu is can be scrolled down and will adjust to the number of packs installed, so there is no limit on resource packs that can be installed.
There will be a little check mark next to the currently selected pack that clarifies which pack is currently selected. The default pack is, of course, the game's default resources (meaning disabled custom pack, using default assets instead). Depending on how fast the computer running this is it might lag for a second after a pack is selected, as the game loads all the resources/assets and applies them. After a pack is chosen, the game will return to the mod menu.
Online, other players will not be able to see any of the resources other players have installed. Nobody but the client is affected. It is private changes, so nobody can be bothered by weird texture packs or other shenanigans.
Save Settings as Default on Start, this button will save the currently selected packs and open them up directly the next time the game is launched. Note: it will add ~3 seconds to the loading time, depending on the pack. This way user can immediately use their favorite texture pack without having to go into the menu and select it.
Multiple texture packs can be loaded by holding down Shift-Key and click on the texture pack to be loaded on top of the current.
Select Map (Select Level)[]
When clicked, the "Select Map" button will open this menu. This is where to select the map the game starts on when the "Start Game" button is pressed. When any of the maps on the menu is clicked, it will be chosen. (The game does not start before "Start Game" is clicked).
Normal Maps[]
The normal maps to choose from are all the chapters (1-10). These are on the top left side of the screen.
Horde Maps[]
Users can also choose from 5 Horde maps currently in the game, Emerald Forest, Mountain Glenn, Forever Fall, Merlot Island, Merlot Lab. These are on the bottom left side of the screen.
Custom Maps[]
The custom maps aren't loaded automatically, to load the maps that are installed, press the "Mod Maps: (click to load)" button. Then the mod will start to load the maps into playable maps. This might take a while depending on how many maps to load and how detailed or large they are. (Should not take more than a minute, about 10 seconds). After they are finished loading, the available custom maps will appear on the right side of the screen. And can be started through the Mod menu's 'Start Game' button.
In order to play multiplayer with custom maps, both players have to have the map installed and be friends on Steam. Both players load the map in the Select Map menu. The host starts the map through the Mod Menu, while the other friend go to the Multiplayer menu 'Play with friends'. And select the friend's game from there to join.
Key Bindings[]
Click Key Bindings button to be taken to the key bindings menu. This menu works like so: click a button that corresponds to the binding the user wants to change. After that, the mod will wait for any key to be pressed. The next keypress will be the new binding. (Mouse clicks are also acceptable, as well controller buttons).
When done, click on the "Back to Mod Menu" to go back. All the new bindings will be saved.
Notice: key bindings do not save after shutdown.
Achievements[]
In this menu, there is a list of custom achievements (too many to list here). After completing one the empty box next to it will be filled in.
Achievements aren't active by default so they need to be enabled, on the right side. To have them always enabled, turn on "Always On", so they will be activated automatically when the game is restarted.
Chat Commands[]
This menu is just a large wall of text containing information about most of the available chat commands that can be entered. This can thankfully be scrolled down. The back button is in the bottom right corner. For more about chat commands as a feature, please refer below.
Settings Menu[]
Here there are three new buttons, Invert X Axis, Lock On, Advanced Settings.
Other things to note: WIth the mod you can right click the resolution button to go back one step.
Invert X Axis[]
The normal game setting "Camera: Invert" only inverts the Y-axis. With this button, X-axis can be inverted. The text is green when the X-axis is inverted (ON), while the text colour is normal for OFF.
Lock On[]
Some players like the lock on to enemies, others don't. This has varied across the different versions of the game, that being because the lock on mechanics have been changed again and again over time. Most players nowadays like the current lock on mechanics. For those that don't, this can help. White text color indicates a normal lock on (ON). No lock on to enemies (OFF) is indicated with red colored text.
Advanced Settings[]
Here there a lot of other settings that aren't in the normal settings menu. These might be hard to understand, so do some research if necessary. But for simple users there are already presets! FpsFix1, 2, 3, And Extra Good. FpsFixes are presets that lowers the graphics far lower than Potato Quality. 1 being the worst graphics, 3 being the least changes. Extra Good is for Ultra Quality users who just need a little more out of the game. This menu can be scrolled down.
There are also presets for ultra wide screen (eg. 21:9 or 32:9) and flipped screen in the right column.
How to change these values: click on the white text and just start writing. Once done click enter. Even though some of the values appear as text, a number should be entered. Example: "blendWeights: FourBones" - in here, the accepted values are 1, 2, 4. (clarify: 4 = FourBones)
If the input is not correct or not accepted the white text will turn red until an invalid value is entered. If a valid value is entered the text will turn green.
This might be happy news for those who play ultra wide, aspect ratio and resolution can be set to any value in this menu.
Single Player Menu[]
Here there is a new button "TUTORIAL", like it says, it is a tutorial for the game put together. As of yet it is not perfect, but it is a good teacher for the game, going through some of the attack features and tactics. The player also gets to experience Qrow as a tutor. For more helpful information, browse the Wiki.
The tutorial takes place in the emerald forest zone, the same location as the horde map. The tutorial will disable normal features of the game and enabled them one after the other as the user progress in the tutorial (upon exit the game will return to normal). This way the tutorial can focus on one element at the time and go through it so the user gets to know each mechanic. As of yet, there is no voice instructor for the tutorial, every instruction is by text.
The mod also adds 5 buttons for the horde maps to the single layer menu. When clicked you will get to play horde mode in singleplayer mode, useful when steam is down or so.
Pause Menu[]
In single player, the pause menu will actually pause the game (if the mods are installed). There are six new buttons:
- Remove Pause Overlay - Removes the pause menu, so the user can take good screenshots in singleplayer.
- Rank - Shows the user's rank and what is required to complete, and move on to the next one.
- Key Bindings - Menu for changing key bindings.
- Chat Commands - Wall of text about all commands, refer to below for more information on commands.
- Add Bots - Let's the user add bots to play with. (singleplayer only)
- Split Screen - Let's the user do local co-op by split screen. (singleplayer only)
'Chat Commands' button is only available when the game allows typing chat commands. (More about commands in the commands section). Read about key bindings menu and chat command menu above.
If "noHUD" - a chat command - is active pause menu will not appear. This means in single player pause menu will then be a still image. This feature can be used for screenshots that require timing. (or use Remove Pause Overlay)
Profile Menu[]
In here the user can see all their stats, there is even a button to copy the stats to the clipboard so the user can easily share what they got and compare with other users.
There is also an option to style characters. For example: add wings or replace sword.
Do so by clicking the Accessories button. Here you can rotate the characters with A/D-key or arrow keys. To switch character use the little arrows "<" and ">" in the bottom middle. There are actions to choose from that makes the character do some animation.
On the left side there are a menu with bundles that are installed. When a bundle is picked, the items it contains will show up on the right side. Click one of the items to add them, then use the position, rotation and scale input fields at the right top. You can also attach the item to a part of the model, by pressing attach.
When you go back Main menu and start a game, the chosen items will show up on the character.
Mod Behaviour[]
Now after all about the menus and stuff, this article will dig deeper into how each of the mods works.
GrimmSpawnX[]
GrimmSpawnX mod is similar to changing the difficulty. It will multiply the amount of spawned grimm by some factor. The user sets the multiplier factor either in Mods Menu or by the command /grimmspawnx [number] (short: /gsx). Note, with the chat command the user can use multipliers with decimals such as 2.3 times as many grimm.
The control centers gain 11%*multiplier more HP, to counter the incredible increase difficulty when defending control centers.
This mod works in multiplayer (like any other), so friends can together enjoy the increased difficulty.
SpawnGrimms[]
SpawnGrimms mod enabled the user to spawn grimm at will. Grimm can be spawned using the function-keys (f-keys) eg f1 or f4. Androids are spawned with 9-key and 0-key. Only the host can use the keys. Client players can spawn by command, or take use of the bind command to key feature.
[key]: [grimm type]
f1: Creep
f2: Alpha Creep
f3: Beowolf
f4: Alpha Beowolf
f5: Boarbatusk
f6: Ursa
f7: Alpha Ursa
f8: Mutated Deathstalker
f9: Mini Deathstalker
f10: Mutated Creep
f11: Mutated Beowolf
9: Red Android / Melee Android
0: White Android / Ranged Android
They can also be spawn by command. With following syntax: /spawn <Name or ID> [costume index] [noAI]
The argument in <> is obligatory. Arguments in [] brackets are optional and can appear in any order.
If the noAI tag is absent grimm will spawn with AI else with noAI tag grimm will spawn without AI.
By commands the user can also spawn player entities, e.g. by entering "/spawn blake"
With this mod enabled an entity count appears to the bottom left.
PVP[]
With PVP enabled player are able to hurt each other as well as damaging the control centers. Players have a lot more health than grimm, therefore damage is increased when a player hits the other players. There for the same damage values do not apply. Damage amount remains the same for hitting grimm.
The command "/pvp [player name] [player name] ..." will start a death match between those players.
"/pvp end" or "/pvp off" will turn off PVP.
Low Gravity[]
Lowers the gravity.
The factors can be changed with the command /lowgravity [Max] [Slow] (short: /lg)
Max is the maximum velocity, which the gravity will slowly approach. Slow is how slow it will approach that value.
Max is normally -65 and Slow is normally: 1
When mod is enabled the values are (until changed by user) Max: -27 and Slow: 1.8 (until changed)
Another command is "/lowgravity airjump" to make air jumps possible.
To restore to normal apply the command "/lowgravity normal"
Slow Motion[]
When enabled the game speed will slow down to slow motion when M-key is pressed. M-key works as a toggle for slow motion. This key can be changed with the command /slowmotion key [key]
(On controller the key is: L3 + R3)
How much the game should be slowed down can be changed by the command /slowmotion [number] (short: /sm)
The normal value is 0.3. (lower value is slower and higher value is faster game speed)
Max Level[]
This will increase the max level, so the player can level past 10.
After the full release of RWBY:GE the game switched to persistent leveling so each character keeps skill points and progress when the game ended. Because any player should not have an unfair advantage over the other: skill points cannot be gained past level 10.
If more skill points are wanted for testing builds or for fun the command "/moreSkillPointsPlease" come in handy.
Show HP Numbers[]
When enabled, the user can see the exact number of health points an enemy has and the hp a station or control center has. Players can also see their own aura and ultimate in %.
Bad Graphics[]
This is the same as using the FpsFix1 preset + RenderingPath: 0 from the advanced settings menu.
A lot more settings and configuration can be changed in the settings menu or by command.
Acid Grimm[]
When enabled each spawned grimm will be accompanied by a Mutant Creep. This will increase the difficulty although they are not able to make damage towards control centers, just players.
No Kick when Inactive[]
Prevents the game from kicking players for being inactive.
Change Grimm Stats[]
By going to Mods menu -> More -> Change Grimm Stats the user can change different stats for the enemies, for example amount of HP or how much damage their attacks do. These settings are only applied for the grimm spawned by the game, not by the user.
The user can change, size, speed, health, damage, knock back, knock up, stunn, guard.
To undo/remove settings click the Reset button or choose 'Activated: false'. Note: Activated has to say 'true' else this mod will not be active.
Bots and Split screen[]
Bots and split screen feature are available in single player (check pause menu). Bots are NPC that goes around and help you kill grimm. Split screen is so the user can play with a friend on the same screen. RWBYJNPR characters are available. If DLC should be used, it needs to be owned by the original local player. The added characters will have the same level as the original local player.
Split screen and controllers:
The setup wanted needs to be connected before the mod starts. Supported setups are Keyboard&Mouse + Controller and Controller + Controller.
Game Modes[]
Survival[]
This game mode can be played on any level, and will bring the player to an arena-like location on that map. There the mode begins by the player going to the middle. The mode is all about killing grimm, the grimm will spawn in endless waves, each wave becoming increasingly difficult as new and more enemies spawn. Eventually, there will be new derivations of enemy types as the mode runs out of grimm to spawn (because spawning 50 mutant beowolves isn't much fun. New enemies enhance the experience, gvk believes). Every 10 waves there will be an enemy that is slightly harder than the rest, functioning as a small boss.
If the first 10 waves are too easy, they can be skipped by typing "/survival 10" in chat.
Survival is compatible with custom maps. The map maker can choose spawn locations for grimm and such to effectively set up a little arena where survival can be played. The mode will pick up the spawn locations when the map starts and use them for the mode.
If Survival is played in chapter 2 the command "/survuval cc" can be used at the start to play survival with control center / security node.
Time Attack[]
In this game mode, the player should complete the level as fast as possible. When completed a rank is given to the player corresponding to the time it took for them to complete the map. The time required for each rank is different in each map, because the maps are different. If the time runs it is game over and the player has to start over again.
This can help players come up with better strategies to complete the game faster, if they don't use xsplit or similar tool to time themselves. (note: an autosplitter for xsplit exists for this game already, developed by gvk)
Map God[]
In this game mode there are two kinds of players, the host player is map god. The other players are normal players trying to survive.
The host plays grimm-god/map-god and hers/his objective is to kill the other players. The god can control grimm, where to spawn and what grimm to spawn. The god plays from an overview perspective to get a view of the map and can move around using arrow keys or moving the mouse to the sides to move in the desired direction. There are buttons at the bottom where the god can choose what grimm to spawn, then click on the location for the grimm to spawn. Grimm can also be chosen with the number keys 1-9. If the god is lost there is a "go to player" button to bring back the god to the players fighting grimm.
Points for the grimm god are earned when players are hurt or killed. Also when a player reaches a new encounter. The god can then use these points to spawn grimm. Each grimm costs depends on the type of grimm and how hard it is for it to fight it.
The players play from a normal perspective and should try to survive the god's commotion. And the objective is to complete the map without losing to the grimm god.
Dust League[]
This game mode is basically football/soccer in RWBY:GE format - inspired by Rocket League. (developed by SnowSM)
By pressing O-key the host can place, the goals. And P-key to place the ball. This way the players can decide where to play. There are also maps to download if the players want a real field to play on.
Each player when they join is assigned a team, Red or Blue. The objective for each team is to get the ball to the respective goal. There is a scoreboard in the top-right corner keeping track of the teams' score.
This game mode is not available for Mac users, the creator never made a Mac-friendly version of the mod.
Artifact Hunt[]
In this game mode the players are free to roam the world, there are no invisible barriers. There are artifacts scattered around the map, and the players should try to find them. There are always 10 artifacts on the map, every time a player picks one up a new one is spawned elsewhere. The low gravity mod might help while looking for artifacts.
There is a scoreboard keeping track of how many artifacts each player has found.
During Easter, there are easter eggs instead of artifacts.
Missions[]
There are 4 default missions to choose from and then there can also be custom missions installed.
Default missions:
- Odd Grimm Activity 1 - Kill some Grimm and protect people in emerald forest.
- Haunted City - Capture ghosts in Mountain Glenn.
- Beowolves' Attack - Red trailer, meaning kill beowolves in packs in snowy forest.
- Underground - Kill the large outbreak of mutated beowolves.
Each mission has it's own objective and location. Some missions take places on custom maps, which need to be installed before they become playable.
There used to be a mission level where the play would go into and choose what missions. This has been discarded, now there is just a menu in place. (easier and more understandable for the user, gvk believes)
Achievements (custom)[]
These are custom achievements made by gvk, but the ideas are from other people from the community. As the achievements preform many checks on what the player is doing in order to validate the achievements, you will have to turn ON achievements - this is so other users who don't want them shouldn't be affected in any way.
Once on the player can start doing the achievements, to get some challenges. There are too many of them to list in here, but can be seen in the Mod Menu. There will be a filled box next to the completed achievements. Achievements are of course saved.
Trivia[]
There is a server list on the multiplayer menu. It appears after two seconds, the user just has to wait a little while to see the available games. Manual matchmaking could be more effective, gvk believes.
The mods stores a 'Recently Played With' list of the players the user have interacted with. This list can be found inside games files named "Recently Played With.txt", or it can be copied to the clipboard in-game at Main Menu by pressing Ctrl+P. The mod only stores the last 15-20 players played with.
There is a "Random Character" button on the select character menu. This feature can also be activated by pressing R on keyboard or L1+R1 on a controller.
The user can right click the resolution button to go one step/resolution back. Continent when changing resolution.
The mod prevents unnecessary clearing of the chat log during gameplay.
Most Damage Dealt score is added by the mod, so the users can also compare their damage done, and not only kills.
The user is able to walk with keyboard if Ctrl+alt is pressed.
There is a 8-player mod, the mod is called BetaMP in the mod installer, ask gvk for more information.
AntiCheat - anti-cheating system. If turned on it will detect when someone performs some kind of illegal move - like spamming infinite ultimate attacks. Further cheaters can be reported to gvk, that way the system improves.
AnyFix - fixes crashes caused by graphics and or loading faults. Not a 100% fix for everything. Might help some. It will automatically pop up and the launch of the game if it has crashed before.
Show chosen characters, was a removed mod since the game now shows all the players once you join.
If no internet connection or turned off by the user, the mod will go into offline mode.
If Ctrl is held down while any of the following keys will preform some action:
- f1, start the 'unload unused' feature.
- f6, toggle character rendering.
- f8, shows/hides HUD (can be good to use for screenshots)
- f9, show enemy health numbers toggle.
- f10, say thanks.
[to be continued...]
Chat Commands[]
Chat commands are extra functions that can be typed into the chat window to be activated. Chat commands only works in friends only games and private games. Every command typed is case-insensitive.
Some commands (but not all) only work with at least one of these mods activated too:
GrimmSpawnX, SpawnGrimms, AcidGrimms, LowGravity, MapGod, ArtifactHunt
As the player is now allowed to 'cheat'.
This will be a huge list, therefore furthest down on the page. (TODO: make a little more explanatory explanations)
arguments marked <> is obligatory. [] is optional
- /version - prints the mod version in chat.
- /pause - toggles pause function in single player.
- /grimmspawnx <multiplyer> - changes grimm spawn multiplier. Synonyms: gsx
- /spawnrate <rate (a number)> - changes the spawn rate of grimm.
- /spawn <entity name or ID> [noai] [alternate custome index] - spawn grimm or players by name. The "noai" tag does not have to be there, but it indicates that the grimm spawned should have no AI.
- /spawnScale <number> - How large the spawned entities with /spawn should be.
- /killall [name] - Kills all grimm, if name is specified it will only kill that type of grimm.
- /pvp [name],[name],... - starts pvp between players. By putting 'end' or 'off' the pvp mod will end.
- /lowgravity [max] [slow] [airjump] - See low gravity explanation in the section above. Synonyms: lg
- /gamespeed [speed of game] - speeds up or slows down game. Synonyms: sm, slow, slowmotion
- /maxlevel [max level (a number)] - enables max level mod.
- /NoKickWhenInactive - enables that mod. Synonyms: nkwi
- /ShowEnemyHealthNumbers - what it says. Synonyms: sehn, showHP, ShowHealthNumbers
- /ToggleMostDamageDealt - Toggles that mod to record damages or not, Synonyms: MD
- /graphics - See how to use in the entire section here, Synonyms: gfx, bg
- /fixtext - an attempt in making text look good in really low resolutions.
- /survival 10 - skips to wave 10 durring survival. 'cc' instead of 10 in ch. 2 will result in control center spawn.
- /dustColor - removes color from dust league players.
- /godmode [NoDamage/OneHit/Infinite] - turns on godmode. Features can be individualy turned on if desiered.
- /noAI - removes AI for the grimm.
- /moreSkillPointsPlease - gives player more skill points
- /switchCharacter <name> - In singleplayer the user can switch character mid game. Syn.: changeCharacter
- /resetXP - resets the xp of the player.
- /fixXP - if player is level 10 but game doesnt count it, try this.
- /respawnTime
- /resetMap - Player will return to start and resets the level. Synonym: /resetLevel
- /killplayer <player name> - kills that player. Synonym: kill
- /kickplayer <player name> - kicks that player. Synonym: kick
- /noJoin - disables joining for new players. Synonym: kickAllJoiningPlayers
- /showTitleMessage <message> - Message can be split by "/n". Will display message on screen.
- /playmusic <music ID> - plays a particular music. More about IDs here (TODO: make page with IDs)
- /playsound <sound ID> - plays a particular sound. More about IDs here (TODO: make page with IDs)
- /playBattleMusic - plays a list of action music in game.
- /hidePlayer - hides the player (might need to jump for the effect to update).
- /showPlayer - shows the player. Or use "/r" to get back.
- /hideCharacters - hide all characters
- /showCharacters - show all characters. Or use "/r" to get back.
- /hideWeapons - Hides weapons, they are not rendered. Synonym: /showWeapons
- /hidehud - hides the hud (type twize to reverse) Synonym: nohud
- /showhud - shows the hud (type twize to reverse). Or use "/r" to get back.
- /clearChat - clears chat window.
- /spectate - spectates other players.
- /ride - rides near by grimm.
- /unride - stop riding grimm.
- /lockOn - toggles lock on. Synonym: autoTarget, autoRotateTowardsAttacker
- /scalePlayer <amount> - scales player some amount
- /bighead [relative size] - scales player head some amount. type '/bighead off' to remove effect.
- /ScaleBodyPart <body part name> [relative size] - scales some body part by name.
- /everybodydotheflop - yeah. there are actually more of these random not listed here.
- /GrimmSetting [value, value, value, ...] -
- /AntiCheat - toggles anticheat.
- /rearview - creates a camera backwards. Synonym: dorsalview
- /firstpersonview [mode (a number)] - puts player in first person mode. Synonym: firstperson, fps, fpv, fp
- /texturepack default - restorees default texture pack.
- /texturepack load [name] - Loads texture pack mid game.
- /reloadTextures - reloads texture pack.
- /printSound - prints current sound in output_log.txt
- /repeat - repeats last command. Synonym: r
- /unloadUnused - clean up memory process.
- /bind <key> <command> - binds perticular key to command
- /unbind - unbinds key.
- /image <url> - spawns image from the url. Write remove instead of url to remove.
- /drunk - "drunk" effect.
- /FirstPersonView - Puts the player in first person view. Synonym /fps /fpv
- /cinematiccamera - puts camera in cinematic mode.
- /dorsalview - cameraview lets you look backwards. Synonym: /rearview
- /resetCamera - resets the camera from any changes, eg firstperson
- /timer [start/stop/reset/remove] - starts ingame timer, can be used to time things.
- /screenshot [multiplier (1-5)] - takes a large screen shot and put it in your screenshot folder. you can add a multiplier to your screen resoulution. NOT recommended to go above 5.
- To be continued...